Difference between revisions of "Checker"
| Line 4: | Line 4: | ||
[[File:Welcome.png|link=|alt=]] | [[File:Welcome.png|link=|alt=]] | ||
| + | |||
'''Open existing database''' | '''Open existing database''' | ||
:Choose this option if you already have a database available and would like to open it now. Note that after having closed the start screen you can always open an existing database by clicking the [[Open Database]] button. | :Choose this option if you already have a database available and would like to open it now. Note that after having closed the start screen you can always open an existing database by clicking the [[Open Database]] button. | ||
| + | |||
'''Import Location Table Exchange Format into new database''' | '''Import Location Table Exchange Format into new database''' | ||
:If you have a Location Table (as a ZIP-file) at your disposal and would like to import it to a new, empty database, this is the option to choose. Alternatively, click the [[Import Location Table Exchange Format]] button after having closed the start screen. | :If you have a Location Table (as a ZIP-file) at your disposal and would like to import it to a new, empty database, this is the option to choose. Alternatively, click the [[Import Location Table Exchange Format]] button after having closed the start screen. | ||
| + | |||
'''Show "TMC Location Table Requirements" document''' | '''Show "TMC Location Table Requirements" document''' | ||
Revision as of 08:26, 8 May 2012
Getting Started
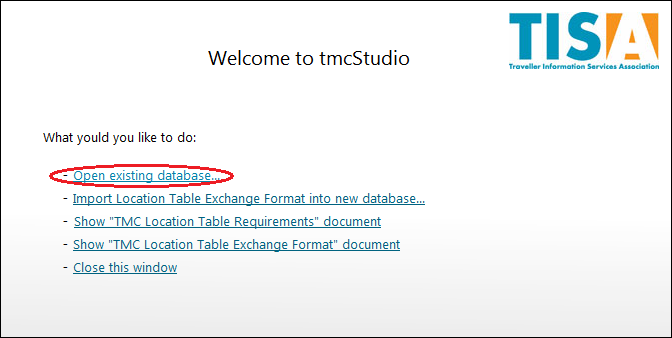
When you start tmcStudio, the welcome screen offers you the following options:
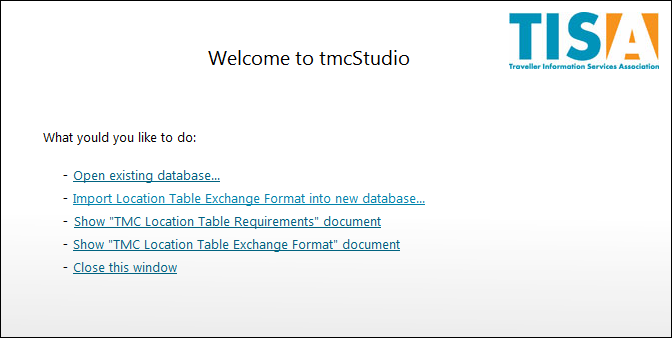
Open existing database
- Choose this option if you already have a database available and would like to open it now. Note that after having closed the start screen you can always open an existing database by clicking the Open Database button.
Import Location Table Exchange Format into new database
- If you have a Location Table (as a ZIP-file) at your disposal and would like to import it to a new, empty database, this is the option to choose. Alternatively, click the Import Location Table Exchange Format button after having closed the start screen.
Show "TMC Location Table Requirements" document
Show "TMC Location Table Exchange Format" document
- Opens the corresponding PDF-file in Adobe Acrobat. Note that you can always open those files after having closed the start screen by using the Help menu.
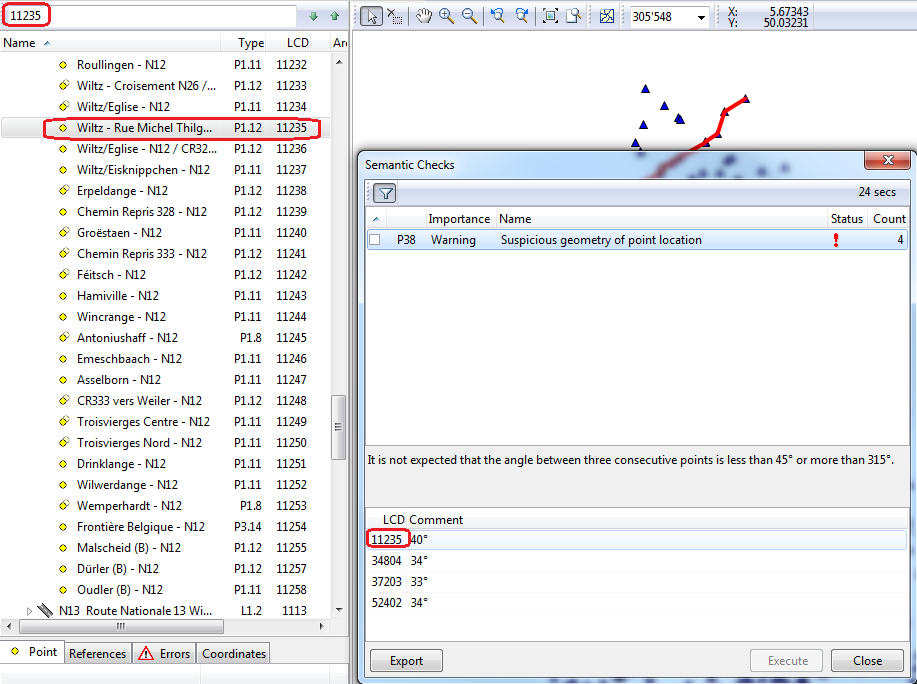
How to perform a TMC Check
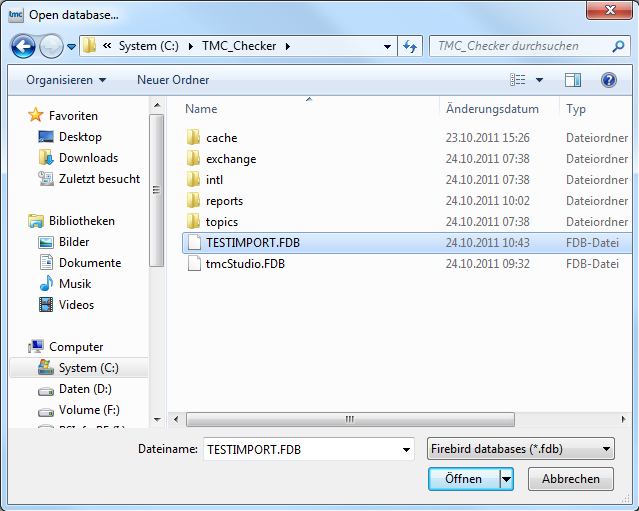
To carry out a TMC Check, when opening the file, Import Location Table Exchange Format into new database... has to be chosen.
Afterwards a window appears, where in Database file the appropriate file is chosen.
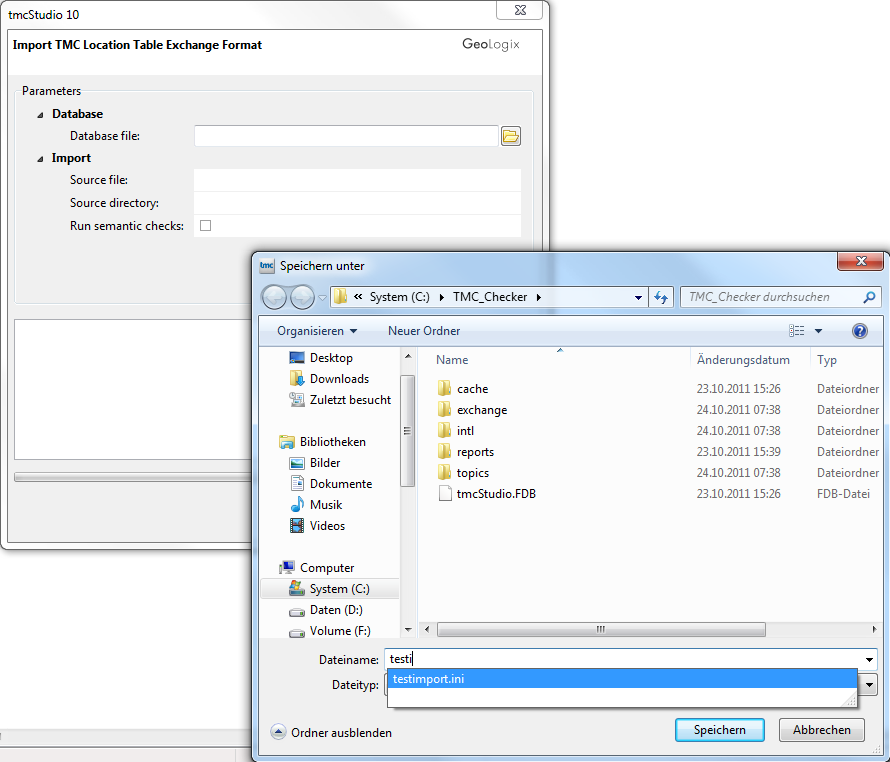
As Source directory the folder Exchange files in Directory is chosen.

And lastly, the function Run semantic checks has to be activated.
![]()
Now the wanted data are imported, created and checked. This step may take some seconds.
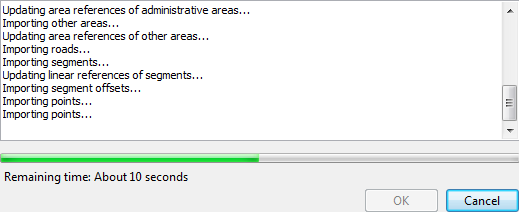
When finished, due to the activation of the semantic check the codes with errors are shown.
To see them directly, Show Only Checks Containing Errors can be clicked.

The errors found in the Structural Checks, are visible when opening Checks\Structural Checks. Again, they are directly shown when activating the filter.

For exporting the information, the most suitable way is to do it by a Combined Report.
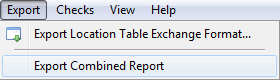
The file is saved as an Excel workbooks (*.xls) in the appropriate folder.
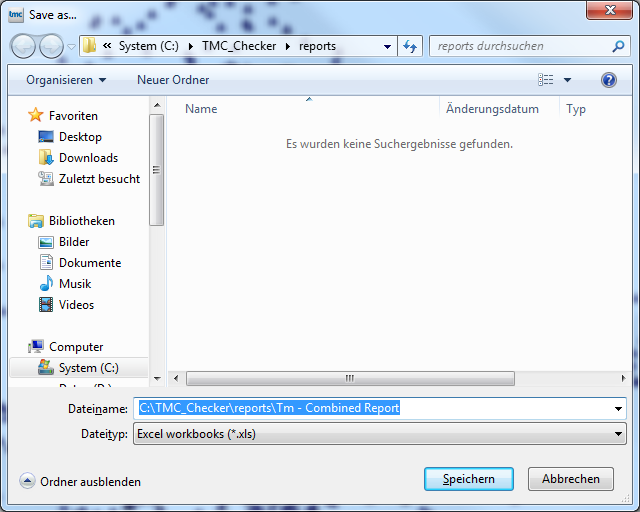
When clicking save, the excel file will automatically be opened. It show the different errors found while checking the TMC.

![]()
![]() Important Advice
Important Advice
If the Check has to be redone, not all the data has to imported for a second time. When using it for again, at the Welcome-window Open existing database... is chosen for importing the data of the prior use.
The file saved before is chosen and afterwards opened.
![]() Important Advice
Important Advice
If the errors have to be visualized on the map, the LCD-Number of the street, given in semantic, respecitvely structural checks is searched in the tree by the Search Tree function.
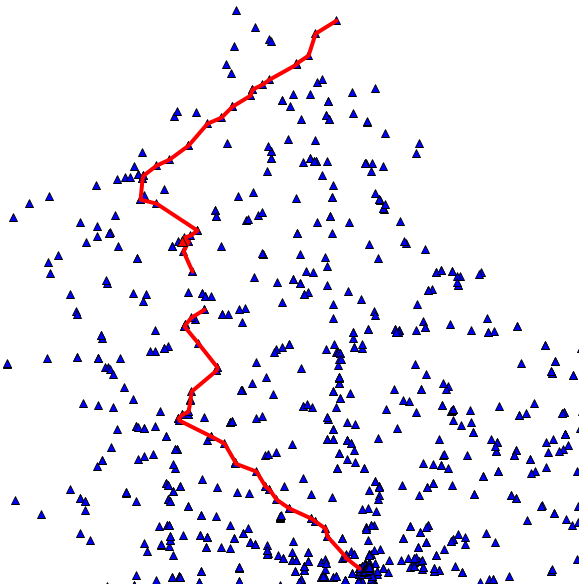
It's possible to have in the tree only the points containing errors. For this, the visibility settings have to be edited and the Semantic Errors activated by putting a tick in front of the error.