Difference between revisions of "Import Location Table Exchange Format"
| (10 intermediate revisions by 2 users not shown) | |||
| Line 1: | Line 1: | ||
| + | The '''Import TMC Location Table Exchange Format''' window opens uppon first use of TMCStudio and after that can be accessed in two different ways: | ||
| − | + | *[[:Category:Import|'''Import''' menu]] → [[File:menu-option_import_.png|link=|alt=]] | |
| − | * | + | *Toolbar → [[File:ImageList-99.png|link=|alt=]] |
| − | |||
| − | + | [[file:Import Location Table Empty.jpg]] | |
| − | + | To import a Location Table, fill in the required blanks in the window, as described below. | |
| − | |||
| + | '''Database''' | ||
| − | + | Double click on the white space next to '''Database file'''. | |
| + | Here you can enter a name for your database. The program will automatically turn it into a Firebird file (*.fdb). | ||
| − | ''' | + | Uppon specifying a database, an .ini file of the same name as the .fdb file will be created under '''Settings file'''. |
| − | |||
| − | + | The project also requires that it be given a name. | |
| − | |||
| − | |||
| + | Once the import process has been completed, the project name will be stored in the .ini file and will appear in the list of projects when you open TCMStudio. | ||
:{{Warning}} | :{{Warning}} | ||
| Line 29: | Line 28: | ||
| − | ''' | + | '''Import''' |
| − | + | ||
| − | + | Depending on the location table format you are trying to import, select either source file or source directory. | |
| + | |||
| + | If your Location Table file is a ZIP file (*.zip), click on the white space next to '''source file''', click on the folder icon and locate the ZIP. | ||
| + | |||
| + | If your Location Table consists of a number of DAT files (*.dat), click on the white space next to '''source directory''', click on the folder icon and locate the directory where your location table (consisting of a number of files in DAT format) is stored. The DAT files all have to be stored within one single folder. | ||
| + | As soon as a valid folder containing the necessary DAT files is selected, the name of the corresponding Location Table is shown in the lower part of the window (large white space). | ||
| − | |||
| − | |||
| − | |||
| − | |||
| − | + | [[file:window_ltshown_sd.png|link=|alt=]] | |
'''Run semantic checks''' | '''Run semantic checks''' | ||
| − | + | ||
| − | + | It is highly recommended that you tick the option run semantic checks for every location table you import into your database! | |
| + | |||
| + | If the option is selected, the imported location table will be verified directly after the data import. | ||
| + | |||
| + | Visit the [[Semantic Checks]] page to learn more about this function. | ||
| + | |||
| + | |||
| + | Once all the data has been entered, the window should resemble this: | ||
| + | |||
| + | [[file:Import Location Table.jpg]] | ||
To start the data import, click the '''OK''' button. | To start the data import, click the '''OK''' button. | ||
| − | + | The location tables will be imported, the database tables created and the data checked. This may take a few seconds. | |
| − | |||
Latest revision as of 14:51, 20 May 2016
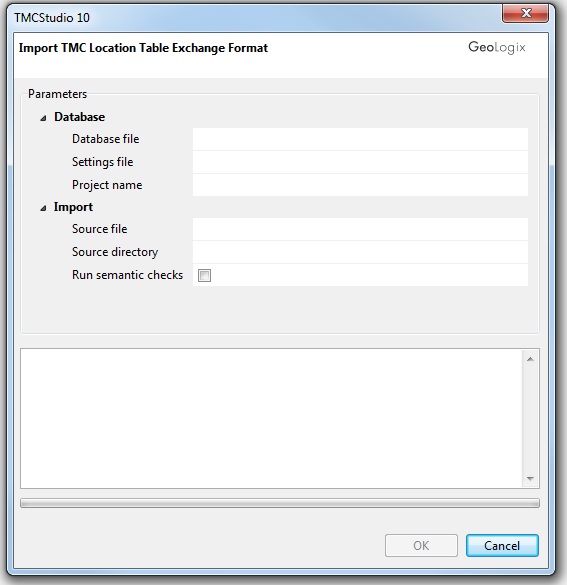
The Import TMC Location Table Exchange Format window opens uppon first use of TMCStudio and after that can be accessed in two different ways:
- Toolbar →

To import a Location Table, fill in the required blanks in the window, as described below.
Database
Double click on the white space next to Database file.
Here you can enter a name for your database. The program will automatically turn it into a Firebird file (*.fdb).
Uppon specifying a database, an .ini file of the same name as the .fdb file will be created under Settings file.
The project also requires that it be given a name.
Once the import process has been completed, the project name will be stored in the .ini file and will appear in the list of projects when you open TCMStudio.
 Important Advice
- Please note that in either case, the database cannot be created on a network drive and/or server!
Import
Depending on the location table format you are trying to import, select either source file or source directory.
If your Location Table file is a ZIP file (*.zip), click on the white space next to source file, click on the folder icon and locate the ZIP.
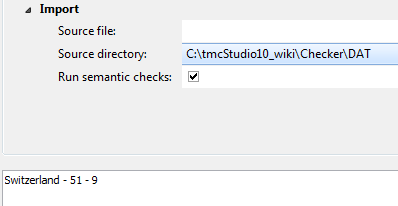
If your Location Table consists of a number of DAT files (*.dat), click on the white space next to source directory, click on the folder icon and locate the directory where your location table (consisting of a number of files in DAT format) is stored. The DAT files all have to be stored within one single folder.
As soon as a valid folder containing the necessary DAT files is selected, the name of the corresponding Location Table is shown in the lower part of the window (large white space).

Run semantic checks
It is highly recommended that you tick the option run semantic checks for every location table you import into your database!
If the option is selected, the imported location table will be verified directly after the data import.
Visit the Semantic Checks page to learn more about this function.
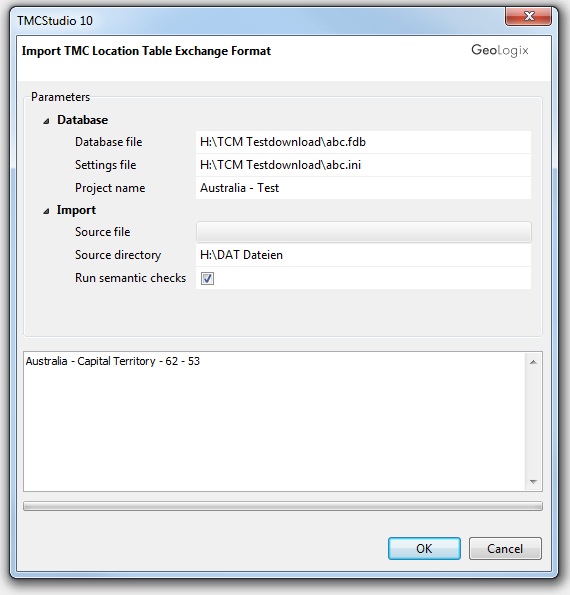
Once all the data has been entered, the window should resemble this:
To start the data import, click the OK button.
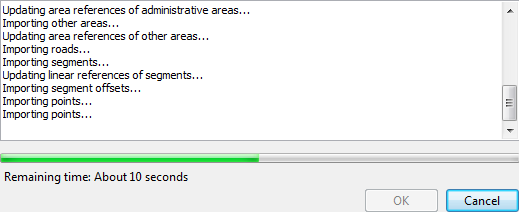
The location tables will be imported, the database tables created and the data checked. This may take a few seconds.

As soon as this process is completed and in case you ran the import routine including the semantic checks, a list of check statements is shown.
Visit the Semantic Checks page to learn how to proceed.

