Edit topic file
Topics → ![]()
Contents
General
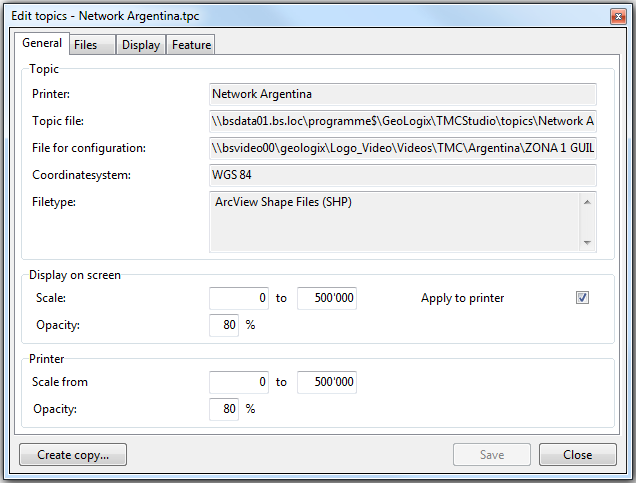
The window general contains the name, the location of the topic file and the file for configuration, the coordinate system used and the filetype.
Scale determines the range within which the data of the topic file is visible on the map. With opacity you can determine how well the data should be visible.
It is adviseable to use the same settings for screen and printer (this can be done by ticking the box apply for printer). This way a printout will look the same as displayed onscreen. Alternatively the box can be left unticked and settings for the printer can be set individually.
Files
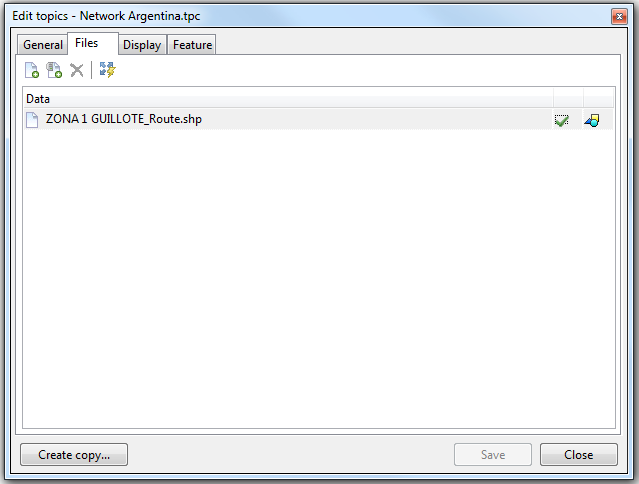
The window files contains the individual files containing the information of the corresponding topic. In this window files can be added or deleted. The extent of these files can also be calculated here.
This button is used to add geodata from one or several files to the topic.
This button is used to add geodatalayers that are provided by a WMS- or SDE-server.
Deletes the currently selected file or layer.
Clicking this button determines the geographical extent of the file based on the integrated georeference. This helps TMC Studio load and display the data more quickly. Files whose extent has been been calculated are displayed with a green tick ![]() .
.
Display
The appearance of the Display window depends on the data that is being processed. The data in question will usually either be raster or vector data.
Raster data
Here you can
- adjust the RGB-values
- brighness & contrast
- ...
- choose to set certain colours to transparent
- choose form a set of prdefined settings
Vector data
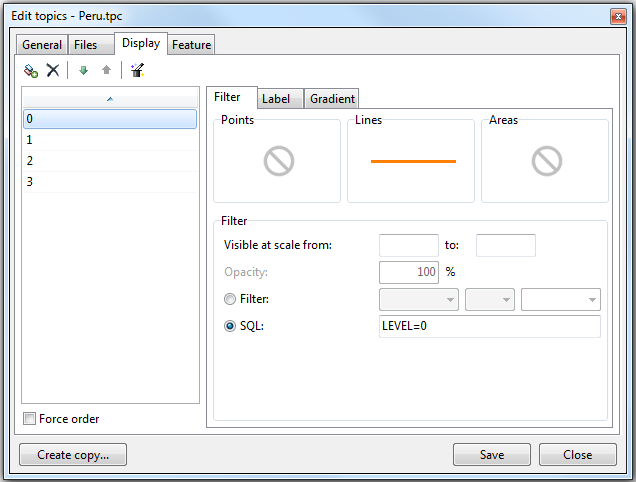
Clicking Add renderer ![]() adds a new row/filter option in the list on the left-hand side of the window. It can be renamed by double clicking on it.
adds a new row/filter option in the list on the left-hand side of the window. It can be renamed by double clicking on it.
Highlighted renderers can be deleted by clicking the ![]() button.
button.
Clicking one of the greens arrows moves the highlighted renderer either further up or further down the list.
Clicking ![]() opens the Wizard window. This help with categorizing and displaying attributes.
opens the Wizard window. This help with categorizing and displaying attributes.
Vector data - Filter
If all objects of a vector layer are to be displaied in the same way, it is suficient to click on one of the three windows Points, Lines or Areas (usually only one of these windows will be active/available). This opens the Settings window where the display design can be adjusted.
If however the attributes of an object call for a different form of presentation, you need to create individual renderers and define filters and display designs for each of them. This can either be done manually by adding a new renderer or by using the wizard ![]() .
.
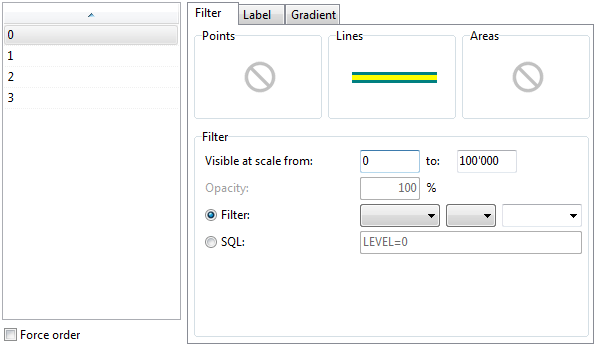
In the Filter window you can choose how your attributes will be displayed on the map.
Once the settings have been completed, further adjustments can be made in the
Visible at scale: The renderer is only displayed within this scale range. This can be useful when working with renderers that require a large amount of computing power, but are for instance only required at a high zoom level (p.ex. aerial photographs)
Opacity: The lower the percentage, the easier it will be to see through that object.
Filter & SQL: Filter allows you to assign a value range. The filter can also be written directly into the field to the right of SQL.
![]() Important Advice
Important Advice
When several renderes are located in the same geographical area and thus overlap, only the topmost rendere is displayed. To remedy this, it is adviseable to sort the renderers that larger signatures are located under smaller signatures. (Thicker lines under thinner ones or larger points under smaller points). This can be done by sorting the individual renderes in the list on the lifet-hand side of the window. To ensure that the renderes are also displayed in this order, the checkbox force order in the lower left-hand corner needs to be ticked.
Vector data - Label
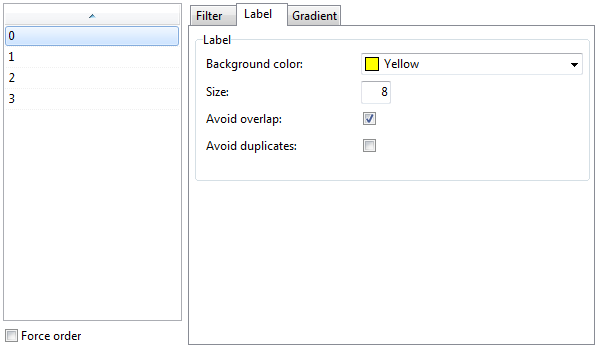
In the window 'Label' the label of the object can be customised. The background color and the size of the lables can be edited here.
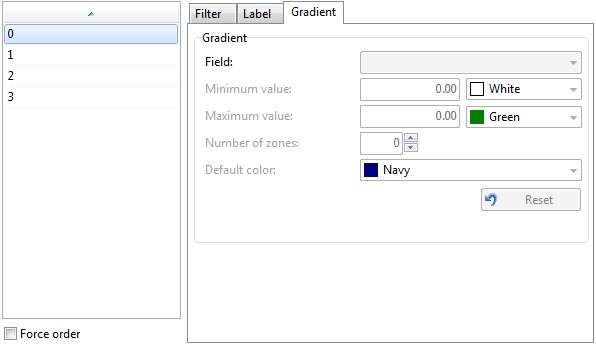
Vector data - Gradient
Feature
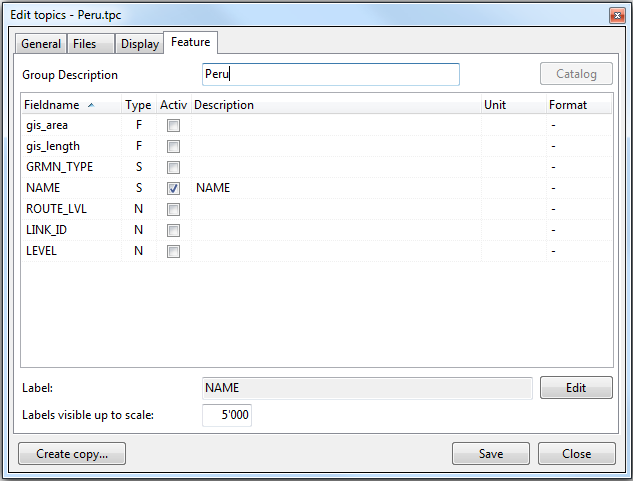
In the window feature you can decide which information is diplayed in the window Topic Information and choose which attributes are used as lables.
Fieldname
This column contains the names of all the attributes in the attached geodata.
Type
Describes the fieldtype of the corresponding attribute field. S = string (textfield); N = numeric (field for integral numbers); F = floating (field for numbers with commas); D = date
Active
For an attribute to be displayed in the window Topic Information, the corresponding box needs to be ticked. In the given example, only NAME would be displayed.
Description
If the name of the attribute is not clear, an alternative description can be entered here. Any text entered here will be displayed in the window 'Topic Information'.
Unit
Here you can enter the unit of the attribute (p.ex.: cm, litre, kg etc.).
Format
Because they are considered to be text, numbers by default are not sorted by value but by digit (1, 11, 112, 12, 2 instead of 1, 2, 11, 12, 112). To remedy this, a row containing numbers can be set to 'number' by double clicking on the field and opening the dropdown list.
Catalog
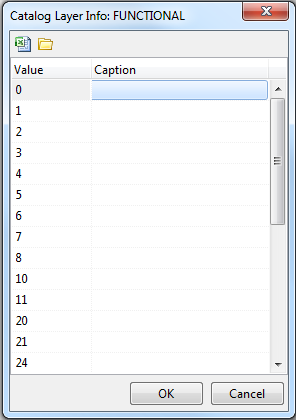
Clicking on the catalog button while an attribute is highlighted opens the following window:
In this window the individual values of the highlighted attribute are listed on the left-hand side. On the right-hand side they can be attributed with new values or names. The list of these names can be saved as .xls file (by clicking on the excel icon) and can be retrievd again via the folder icon.
The new names/values should be chosen sensibly. This can best be checked by opening the window 'Topic Information'.
Edit
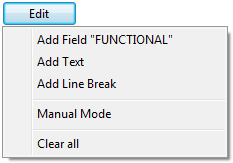
To equip objects with attributes, these attributes need to be entered in the Label window. This is best done by first highlighting an attribute (a row) and then clicking on Edit -> Add field 'XY'".
In this window you can also:
- Add an empty text field
- Add a line break
- Switch into manual mode (useful for deleting entrys)
- Delete all entries
![]() Important Advice
New entries will always appear at the end of the list, even when working in manual mode.
Important Advice
New entries will always appear at the end of the list, even when working in manual mode.
